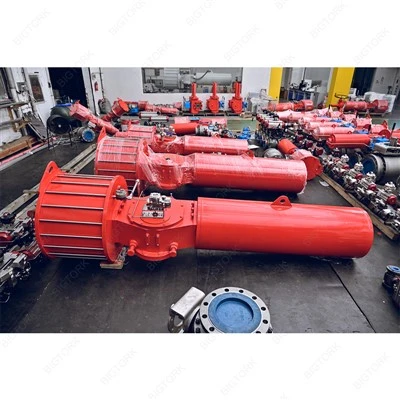
Testing a double acting actuator is a crucial process to ensure its proper functionality, reliability, and safety. As a double acting actuator supplier, I understand the significance of comprehensive testing procedures. In this blog, I will share detailed steps and methods on how to test a double acting actuator effectively.
Understanding Double Acting Actuators
Before delving into the testing process, it's essential to have a clear understanding of double acting actuators. A double acting actuator uses pressurized fluid (usually air) to move the piston in both directions. This allows for precise control of the actuator's movement, making it suitable for a wide range of applications, such as in industrial valves, automation systems, and more.
There are different types of double acting actuators, including the Scotch Yoke Valve Actuator. The scotch yoke mechanism converts linear motion into rotary motion, providing high torque output. Another type is the Actuator Scotch Yoke, which is known for its efficiency and reliability.
Pre - testing Preparations
-
Inspection of Physical Condition
- Examine the actuator for any visible damage, such as cracks, dents, or loose connections. Check the mounting bolts to ensure they are tightened properly. A damaged actuator may not function correctly during testing and could pose a safety hazard.
- Inspect the seals and gaskets. Leaking seals can lead to loss of pressure and affect the actuator's performance. Replace any damaged seals before proceeding with the test.
-
Fluid and Pressure Checks
- If the actuator uses a fluid (such as compressed air), ensure that the fluid supply is clean and dry. Contaminated fluid can cause damage to the internal components of the actuator.
- Check the pressure of the fluid supply. The pressure should be within the recommended range specified by the actuator's manufacturer. Incorrect pressure can lead to improper operation or even damage to the actuator.
-
Electrical and Control System Check (if applicable)
- For actuators that are controlled electrically, inspect the wiring for any signs of damage or loose connections. Ensure that the control system is functioning correctly and that the input signals are being sent and received as expected.
- Test the limit switches (if present). Limit switches are used to control the end - positions of the actuator. Make sure they are properly adjusted and functioning accurately.
Functional Testing
-
Initial Movement Test


- Apply the fluid pressure to the actuator and observe its initial movement. The actuator should start moving smoothly without any jerks or hesitations. If there are any abnormal noises or movements during this initial test, it could indicate a problem with the internal components.
- Check the direction of movement. The actuator should move in the expected direction according to the applied pressure. For example, if the pressure is applied to the port for opening the actuator, it should start to move towards the open position.
-
Full - Stroke Movement Test
- Move the actuator through its full stroke (from the fully closed to the fully open position and vice versa). Measure the time it takes for the actuator to complete a full stroke. This time should be consistent with the manufacturer's specifications.
- During the full - stroke movement, monitor the pressure in the actuator. The pressure should remain relatively stable throughout the operation. A significant drop or increase in pressure could indicate a leak or a problem with the internal mechanism.
-
Repeatability Test
- Perform multiple cycles of full - stroke movements. The actuator should repeat its movement accurately in each cycle. Measure the position of the actuator at the end of each stroke and compare it with the previous cycles. Any significant deviation in the end - position could indicate a problem with the actuator's accuracy.
- Check the torque output during each cycle. The torque should be consistent throughout the testing process. A fluctuating torque could be a sign of internal wear or a problem with the fluid supply.
Performance Testing
-
Torque Testing
- Use a torque wrench or a torque sensor to measure the torque output of the actuator at different positions within its stroke. Compare the measured torque values with the manufacturer's specifications. If the measured torque is lower than the specified value, it could indicate a problem with the internal mechanism, such as worn gears or a weak piston.
- Test the actuator's torque under different pressure conditions. The torque output should increase proportionally with the increase in pressure. If there is no such proportional relationship, it could be a sign of a faulty pressure - to - torque conversion mechanism.
-
Speed Testing
- Measure the speed of the actuator's movement. This can be done using a speedometer or by measuring the time taken for a specific distance of movement. The speed should be within the acceptable range specified by the manufacturer.
- Test the actuator's speed at different pressure levels. The speed should increase with the increase in pressure, but within a reasonable limit. If the speed does not change as expected, it could indicate a problem with the fluid flow or the internal resistance of the actuator.
Safety Testing
-
Over - pressure Protection Test
- Gradually increase the fluid pressure beyond the normal operating pressure to test the actuator's over - pressure protection. The actuator should have a safety mechanism (such as a relief valve) that activates when the pressure exceeds a certain limit.
- Observe the behavior of the actuator when the over - pressure protection is triggered. The pressure should be released safely, and the actuator should not be damaged.
-
Emergency Stop Test (if applicable)
- If the actuator is equipped with an emergency stop function, test it to ensure that it works correctly. Activate the emergency stop and observe the actuator's response. It should stop moving immediately and remain in a safe position.
Comparison with Other Actuator Types
It's also interesting to compare double acting actuators with other types, such as Single Acting Actuator. Single acting actuators use pressurized fluid to move in one direction and a spring to return to the original position. In contrast, double acting actuators offer more precise control and can generate higher forces in both directions.
Our BG Series Scotch Yoke Actuator and Double - Acting P350Scotch Yoke Actuator are designed with advanced features to ensure reliable performance. They undergo rigorous testing procedures to meet the highest quality standards.
Conclusion and Call to Action
Testing a double acting actuator is a multi - step process that requires careful attention to detail. By following the steps outlined in this blog, you can ensure that your double acting actuator is functioning correctly and safely.
If you are in the market for high - quality double acting actuators or have any questions about actuator testing, we are here to help. Contact us for more information and to discuss your procurement needs. Our team of experts can provide you with personalized solutions based on your specific requirements.
References
- Manufacturer's manuals for double acting actuators.
- Industry standards for actuator testing.