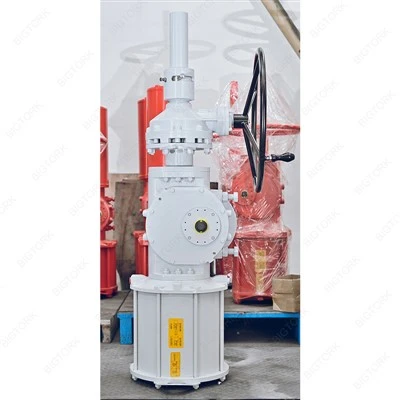
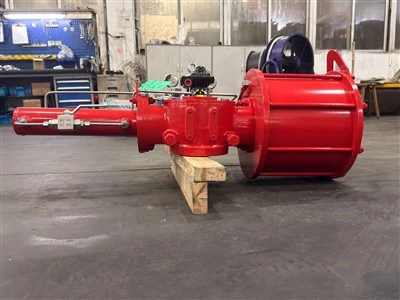
Retrofitting an existing valve with a pneumatic actuator can significantly enhance the valve's performance, efficiency, and control capabilities. As a pneumatic actuator supplier, I've had the privilege of working with numerous clients to retrofit their valves, and I'm excited to share my insights and expertise on this topic.
Understanding the Basics of Valve Retrofitting
Before delving into the retrofit process, it's essential to understand the fundamental concepts behind valve retrofitting. Retrofitting involves replacing or upgrading the existing valve actuator with a new pneumatic actuator to improve the valve's functionality. This process can be driven by various factors, such as the need for better control, increased automation, or compliance with new industry standards.
Assessing the Existing Valve
The first step in retrofitting a valve with a pneumatic actuator is to conduct a thorough assessment of the existing valve. This assessment should include the following aspects:
- Valve Type: Identify the type of valve, such as ball valves, butterfly valves, or gate valves. Different valve types require different actuator configurations, so it's crucial to select the appropriate actuator for the specific valve type.
- Valve Size: Determine the size of the valve, which is typically measured by the valve's nominal diameter. The actuator's torque output must be compatible with the valve's size to ensure proper operation.
- Valve Condition: Evaluate the condition of the valve, including any signs of wear, corrosion, or damage. If the valve is in poor condition, it may need to be repaired or replaced before the actuator retrofit.
- Valve Operation: Understand the valve's operating requirements, such as the desired opening and closing speed, the frequency of operation, and the level of control needed. These factors will influence the selection of the pneumatic actuator.
Selecting the Right Pneumatic Actuator
Once the existing valve has been assessed, the next step is to select the right pneumatic actuator for the retrofit. There are several types of pneumatic actuators available, each with its own unique features and benefits. Some of the most common types of pneumatic actuators include:


- P350 Double-Acting Scotch Yoke Actuator: This type of actuator is known for its high torque output and reliability. It is suitable for applications that require a large amount of force to operate the valve.
- AT190 SR Spring-return pneumatic Actuator: A spring-return actuator is designed to return the valve to a pre-set position in the event of a loss of air pressure. This type of actuator is commonly used in safety-critical applications.
- Double Acting Rotary Actuator: Double-acting actuators use air pressure to both open and close the valve. They offer precise control and are suitable for applications that require frequent operation.
- Air Torque Actuator: Air torque actuators are designed to provide high torque output with a compact design. They are often used in applications where space is limited.
- Pneumatic Quarter-Turn Valve Actuator: This type of actuator is specifically designed for quarter-turn valves, such as ball valves and butterfly valves. It provides a quick and efficient way to open and close the valve.
When selecting a pneumatic actuator, it's important to consider the following factors:
- Torque Requirements: The actuator's torque output must be sufficient to overcome the valve's operating torque. This can be determined by calculating the valve's friction torque, seating torque, and any additional loads.
- Actuator Type: Choose the actuator type that best suits the valve's operating requirements and application. Consider factors such as the desired opening and closing speed, the frequency of operation, and the level of control needed.
- Mounting Configuration: Ensure that the actuator can be easily mounted to the existing valve. Most pneumatic actuators are designed to be compatible with standard valve mounting interfaces, but it's important to verify this before making a selection.
- Air Supply Requirements: The actuator requires a reliable air supply to operate. Consider the air pressure, flow rate, and quality requirements of the actuator when designing the air supply system.
Preparing for the Retrofit
Before installing the new pneumatic actuator, it's important to prepare the valve and the surrounding area for the retrofit. This may include the following steps:
- Shut Down the System: Ensure that the valve is in the closed position and that the system is shut down to prevent any accidental operation during the retrofit.
- Disconnect the Existing Actuator: If the valve has an existing actuator, disconnect it from the valve and remove it from the system. This may involve removing bolts, nuts, or other fasteners.
- Clean the Valve: Clean the valve and the mounting surface to remove any dirt, debris, or corrosion. This will ensure a proper seal between the actuator and the valve.
- Inspect the Valve: Conduct a final inspection of the valve to ensure that it is in good condition and ready for the new actuator. Check for any signs of wear, damage, or leaks.
Installing the Pneumatic Actuator
Once the valve and the surrounding area have been prepared, it's time to install the new pneumatic actuator. The installation process may vary depending on the type of actuator and the valve, but the following general steps can be followed:
- Mount the Actuator: Position the actuator on the valve and align it with the mounting holes. Use bolts, nuts, or other fasteners to secure the actuator to the valve.
- Connect the Air Supply: Connect the air supply lines to the actuator according to the manufacturer's instructions. Ensure that the connections are tight and leak-free.
- Install the Control System: If the actuator requires a control system, such as a solenoid valve or a positioner, install it according to the manufacturer's instructions. Connect the control system to the actuator and the power supply.
- Test the Actuator: Once the actuator is installed, test it to ensure that it is operating properly. Open and close the valve several times to verify that the actuator is providing the correct amount of torque and that the valve is opening and closing smoothly.
Commissioning and Testing
After the pneumatic actuator has been installed, it's important to commission and test the system to ensure that it is functioning correctly. This may include the following steps:
- Check the Air Supply: Verify that the air supply is providing the correct pressure and flow rate to the actuator. Check for any leaks in the air supply lines.
- Calibrate the Actuator: If the actuator has a positioner or other control device, calibrate it to ensure that it is providing accurate control of the valve. This may involve adjusting the setpoints, the gain, or the other parameters of the control device.
- Test the Valve Operation: Open and close the valve several times to verify that the actuator is operating correctly and that the valve is opening and closing smoothly. Check for any signs of binding, excessive wear, or other problems.
- Monitor the System: Monitor the system for a period of time to ensure that it is operating reliably. Check for any changes in the valve's performance, such as changes in the opening and closing speed or the level of control.
Maintenance and Troubleshooting
Once the pneumatic actuator has been installed and commissioned, it's important to perform regular maintenance to ensure that it continues to operate reliably. This may include the following tasks:
- Lubrication: Lubricate the actuator's moving parts according to the manufacturer's instructions. This will help to reduce friction and wear and extend the actuator's lifespan.
- Inspection: Inspect the actuator and the valve regularly for any signs of wear, damage, or leaks. Replace any worn or damaged parts as needed.
- Cleaning: Clean the actuator and the valve regularly to remove any dirt, debris, or corrosion. This will help to prevent the buildup of contaminants and ensure that the actuator is operating smoothly.
If the pneumatic actuator experiences any problems, it's important to troubleshoot the issue as soon as possible. Some common problems that may occur with pneumatic actuators include:
- Air Leaks: Air leaks can cause the actuator to operate inefficiently or not at all. Check the air supply lines and the connections for any signs of leaks and repair them as needed.
- Low Torque Output: If the actuator is not providing enough torque to operate the valve, it may be due to a problem with the air supply, the actuator's internal components, or the valve itself. Check the air pressure, the flow rate, and the actuator's internal components for any problems and repair them as needed.
- Erratic Operation: Erratic operation of the actuator may be due to a problem with the control system, the air supply, or the actuator's internal components. Check the control system, the air pressure, the flow rate, and the actuator's internal components for any problems and repair them as needed.
Conclusion
Retrofitting an existing valve with a pneumatic actuator can be a cost-effective way to improve the valve's performance, efficiency, and control capabilities. By following the steps outlined in this blog post, you can ensure that the retrofit process is successful and that the new pneumatic actuator operates reliably. If you have any questions or need further assistance with valve retrofitting, please don't hesitate to contact us. We have a team of experienced professionals who can help you select the right pneumatic actuator for your application and provide you with the support and guidance you need throughout the retrofit process.
References
- "Pneumatic Actuators: Principles, Types, and Applications." Industrial Automation Handbook.
- "Valve Actuator Selection Guide." Valve Manufacturers Association.
- "Retrofitting Valves with Pneumatic Actuators: Best Practices." Process Engineering Magazine.